4th August 2019 – Added page.
New 4″ panel:
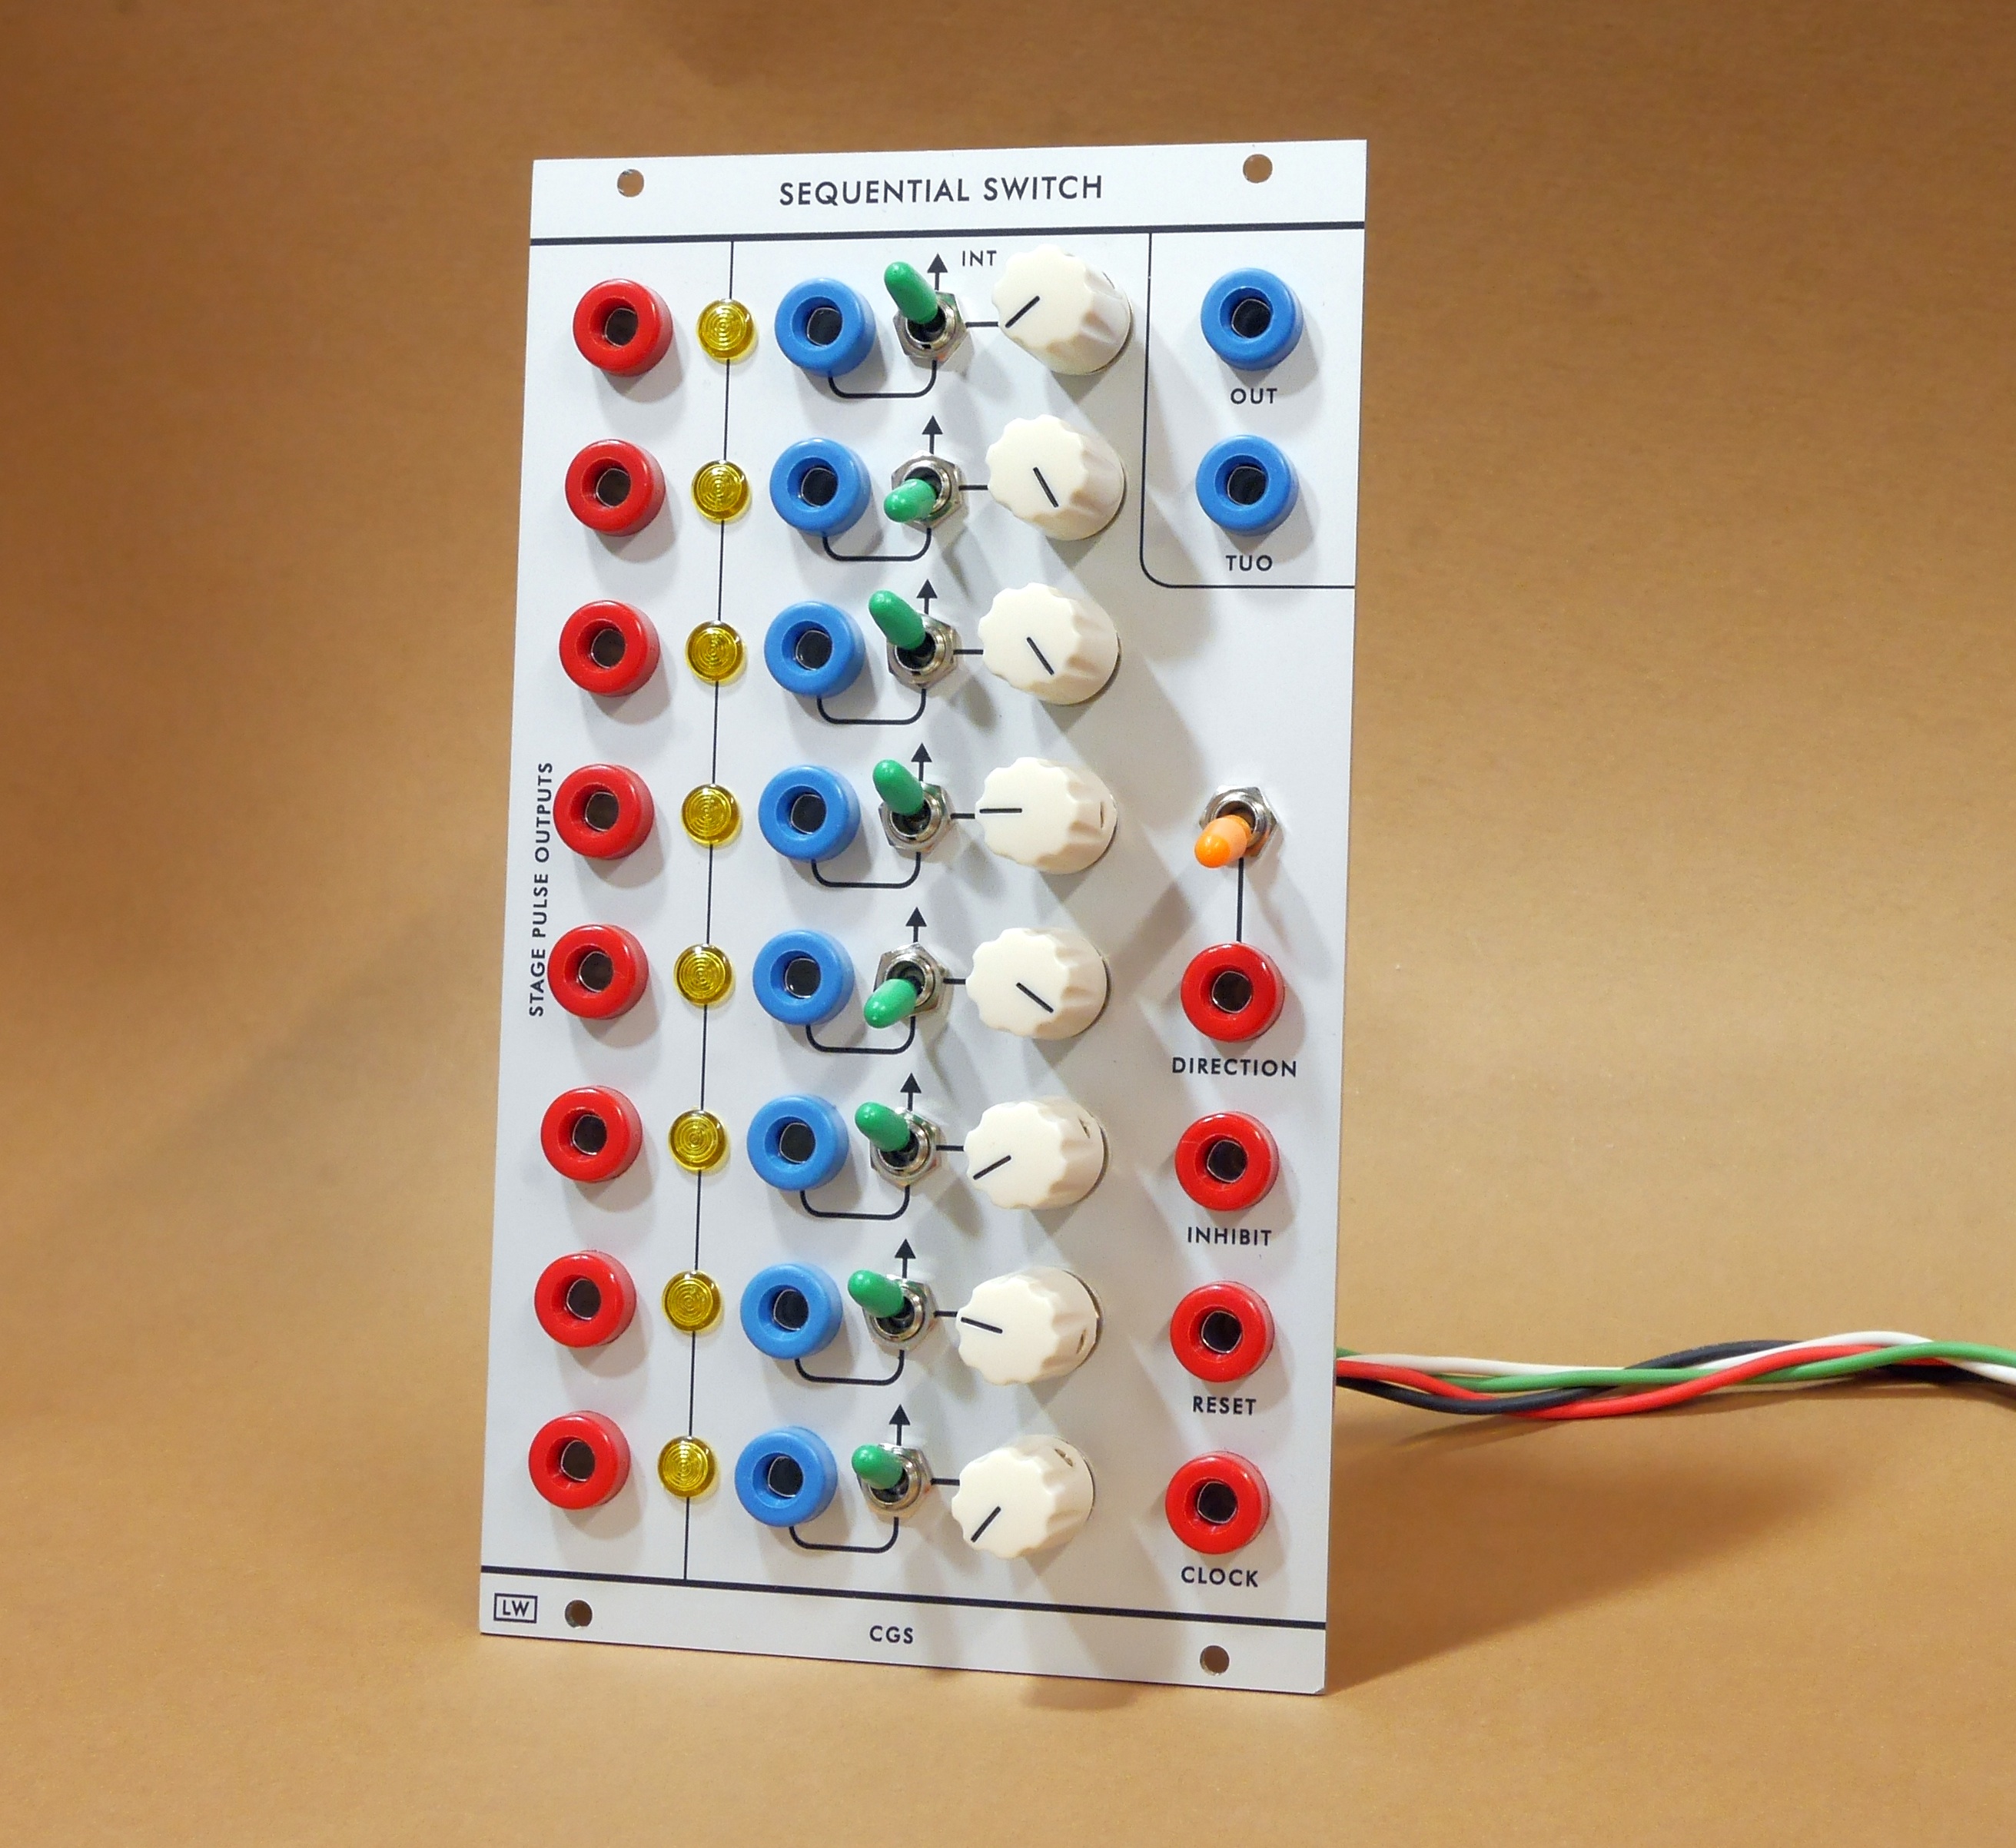
The Sequential Switch PCB (CGS 28) is available from Modular Addict and Elby, and more detailed construction notes are here
This panel utilises Clee’s 4U Bracket, also available from Synthcube and Modular Addict
Construction notes for LW panel:
I use Thonk’s 9mm R/A Alpha pots, construction can be made slightly easier (ie less wiring) if you bus connections on the panel – before wiring to the PCB – using stripboard and wire, like this:

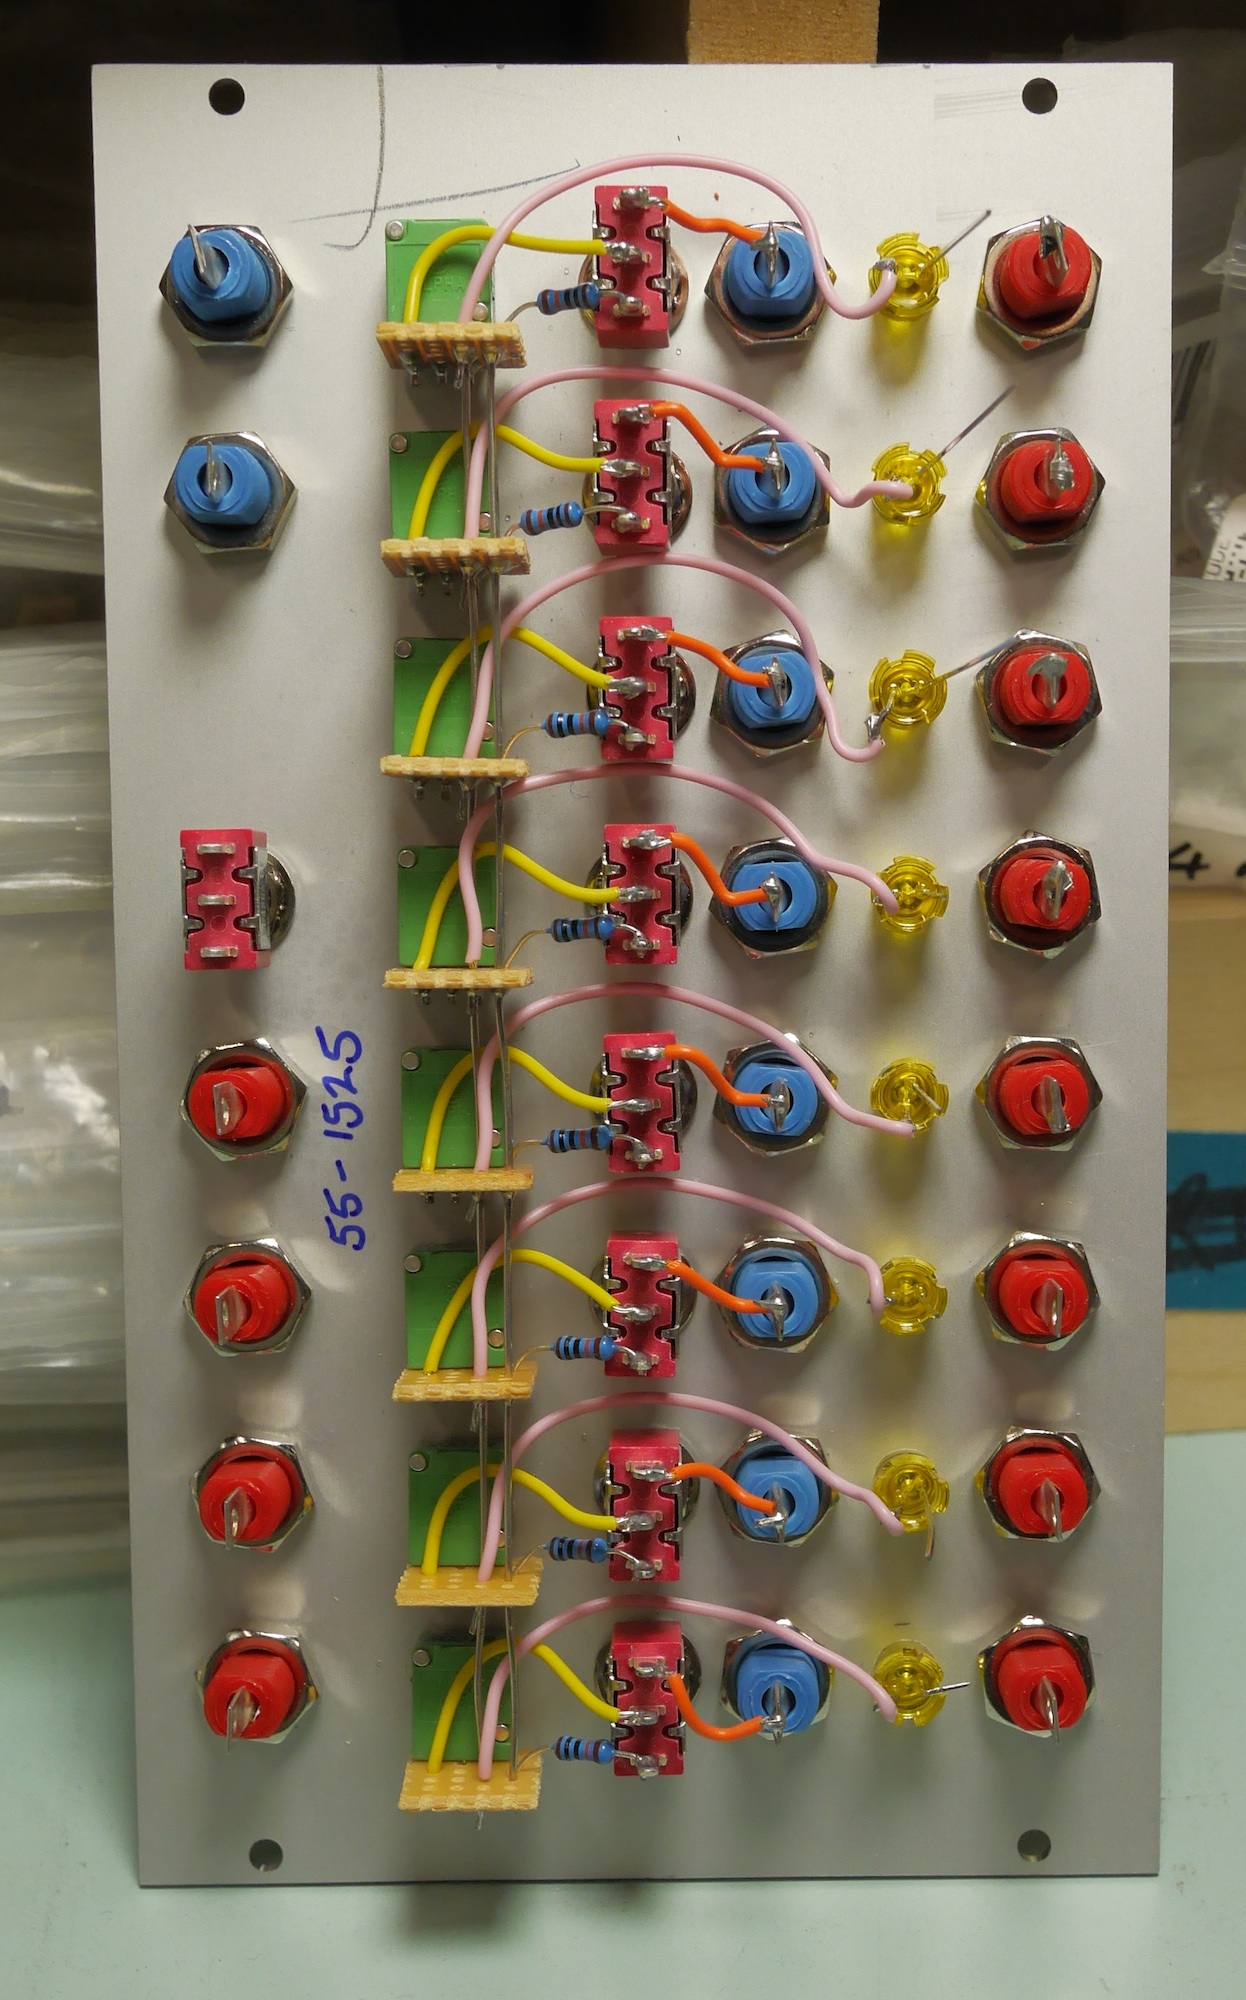 Note the stripboard ‘pot chicklet’ is actually 4 holes wide by 5 holes deep, and the pot is fitted to the left hand side (when looking from the back like this) the CCW pot lug has a ground bus wire which you can see has all the LED cathodes connected to it (pink wires). Pot CW lug is connected to the middle pin of the SPDT switch (yellow wires). CV input is connected to the top pin of the switch (orange) and the lower pin is connected to the +V bus on the 4th strip of the chicklet via a 100K resistor. Ignore the code (55-1525) it just reminds me what LEDs I used and what RLED I selected.
It is probably a good idea to add some insulation (ie heatshrink) to the bus wires as you push the length of wire through the construction, simply cut bits of heatshrink to length and add as you go. No need to heat the shrink as it can’t go anywhere!
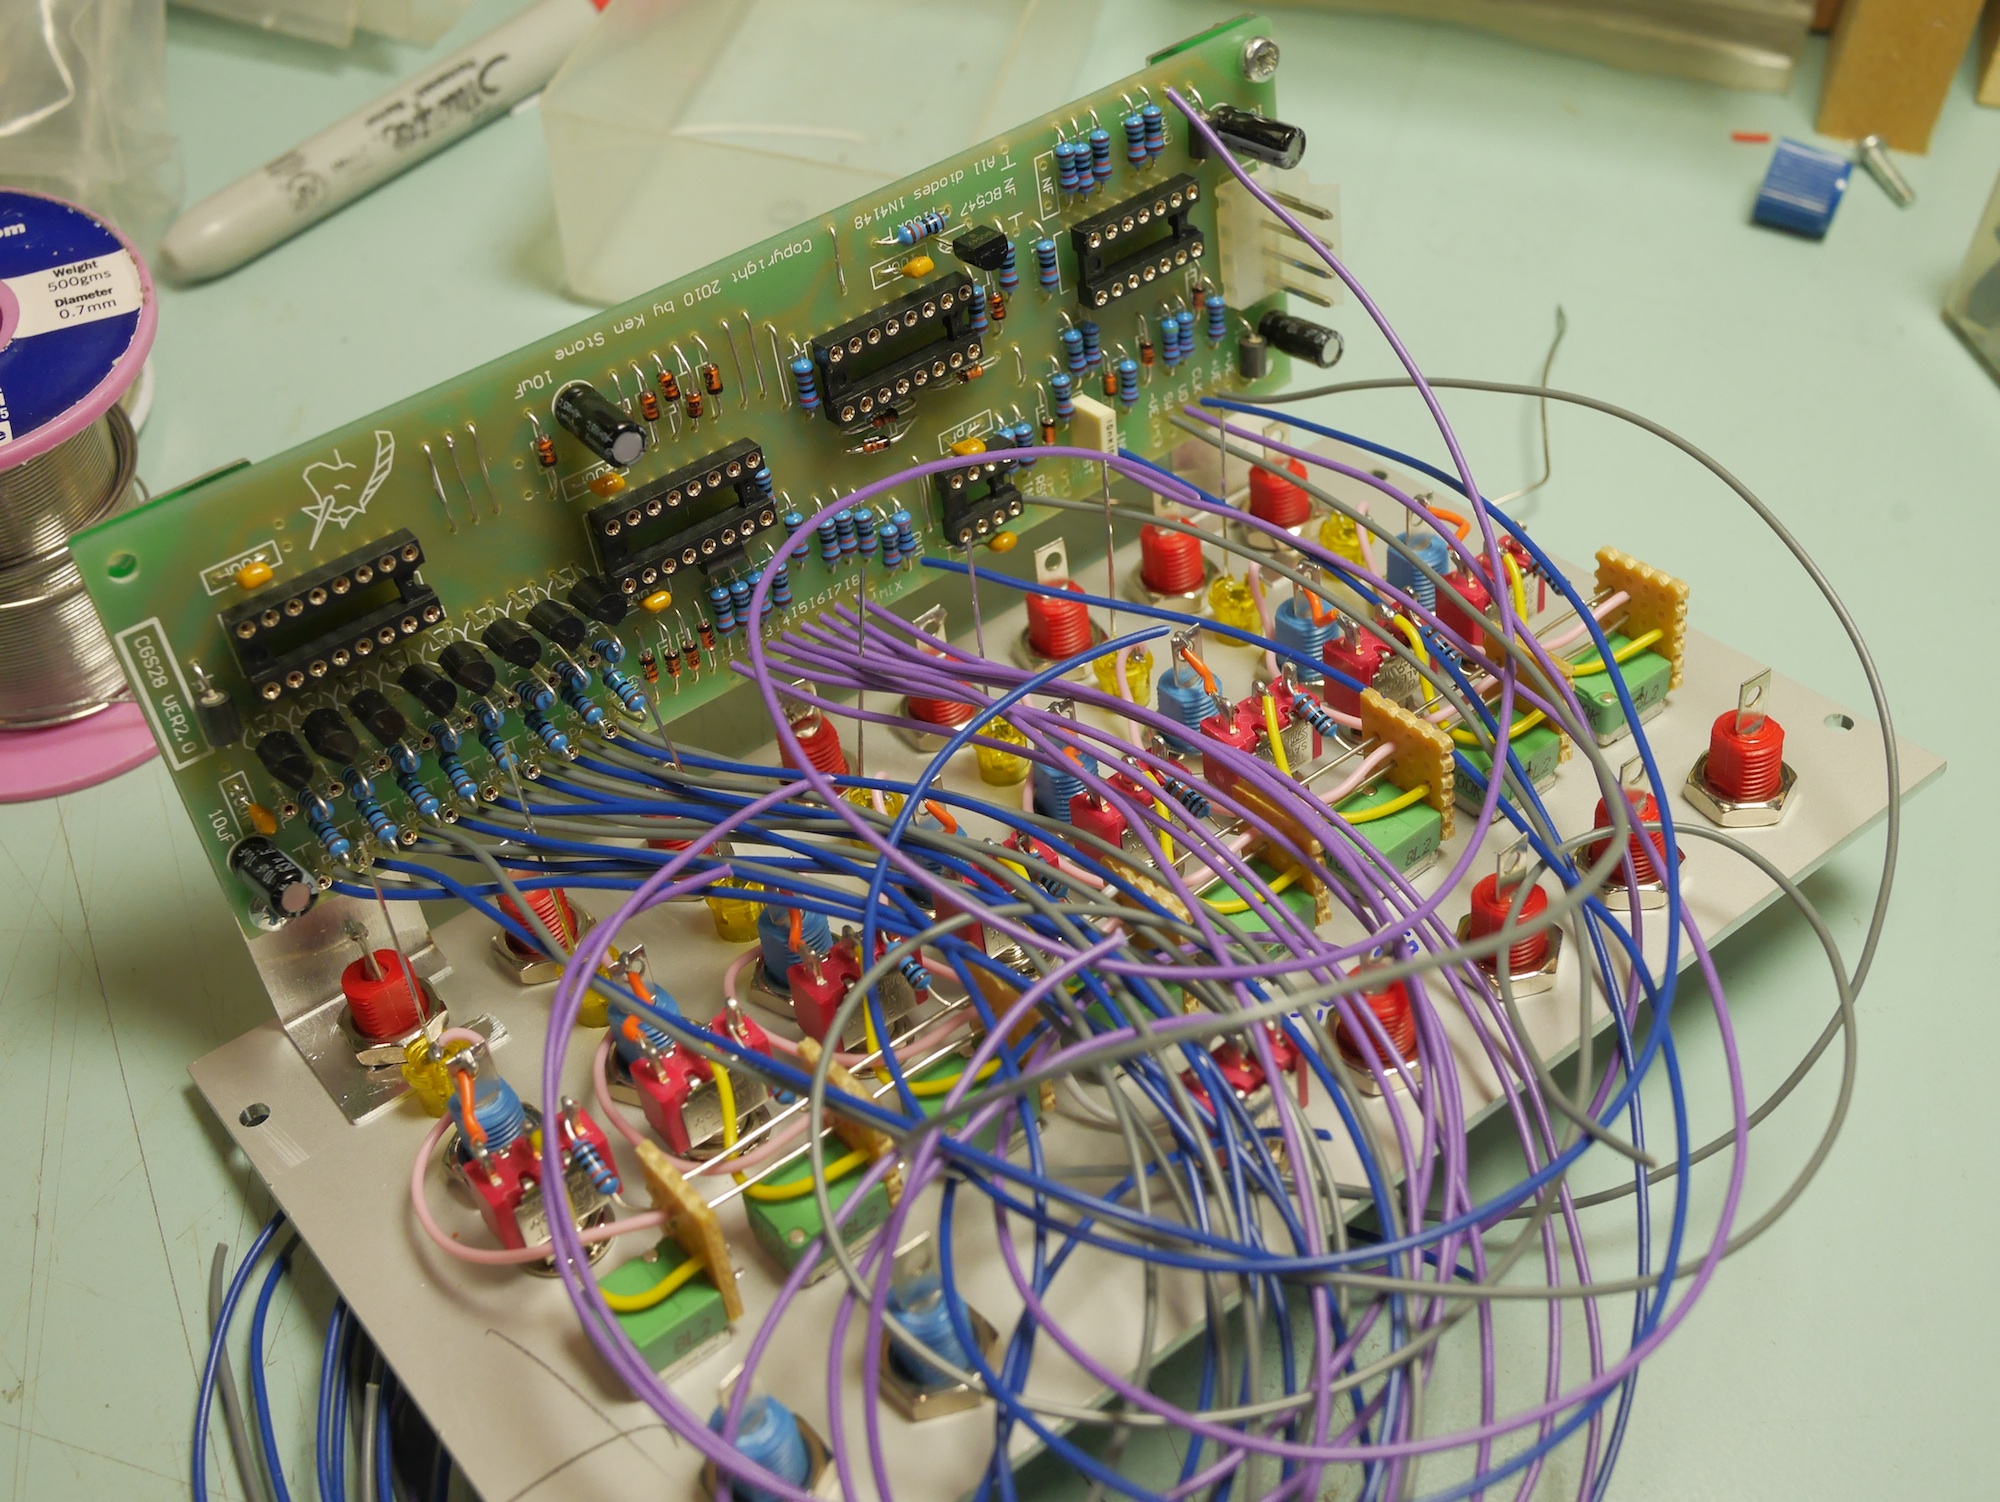
Before beginning to wire PCB to panel/bracket I add all the wires to the PCB, cut longer than they need to be (though of course in this picture they are FAR longer than they needed to be!) and use the offcuts to wire up the next module. I then measure wire to length, add a bit for an ‘engineers loop’, cut and solder.